

I did another sample of “Wrapping a texture or pattern around an Object”
Here are the steps/process in wrapping a texture or pattern around an object:
Step 1: Open the first (for distortion and wrapping image)

Step 2: Open the 2nd image (to be wrapped) remove the background. Copy this to the fist document.
Step 3: Paste this to the first Document

Step 4: You now have 2 Layers
Step 5: Image – Adjustments – Desaturate

Step 6: At this point: Duplicate the layers to avoid stepping backward later

Step 7: Image – Adjustments – Levels

Step 8: Adjust to eliminate the Gray and increase saturation

Step 9: Blur –Gausian Blur (set between 3 to 10)


Step 10: Save this as the distortion map

Step 11: Move and deactivate the adjusted & blurred layer/ activate the desaturated copy and move between the flag Layers

Step 12: Filter – Distort – Displace
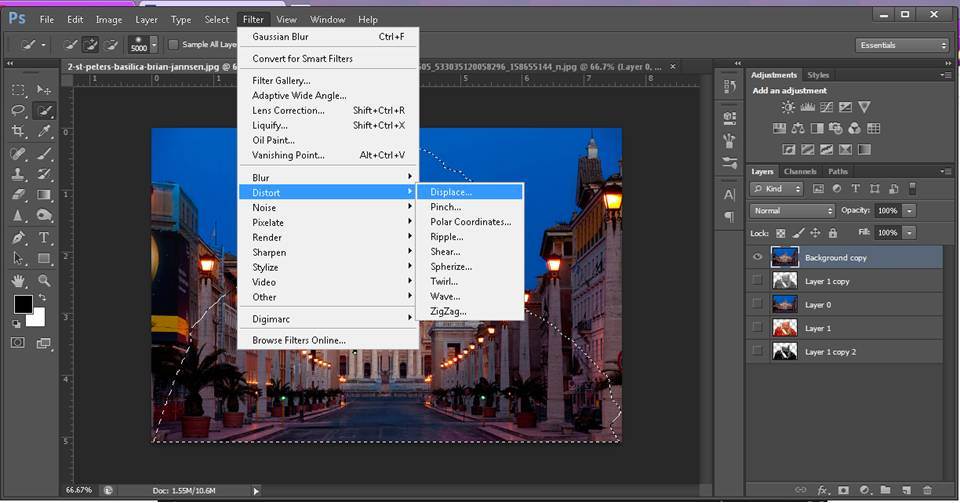
Step 13: Load the Displacement map (the file saved earlier)

Step 15: Activate the target image (to be wrapped) Click Control + icon to load the image

Step 16: Activate the distorted layer; Hold down the Vector Mask Icon

Step 17: Change the blending mode to Overlay


Step 18: Activate the Background layer

Step 19: Save the Image if you are satisfied with the result

Have a nice day and God Bless!
.


